← Raid archive

RAID / NORMAL GUIDE

Vow of the Disciple

Read the glyphs. Carry the relics. Face the Disciple.

Players
6
Title
Disciple-Slayer

Destiny 2 / Normal clear guideSource review:

00 / BEFORE THE PULL

Agree on the glyphs first.

A shared vocabulary

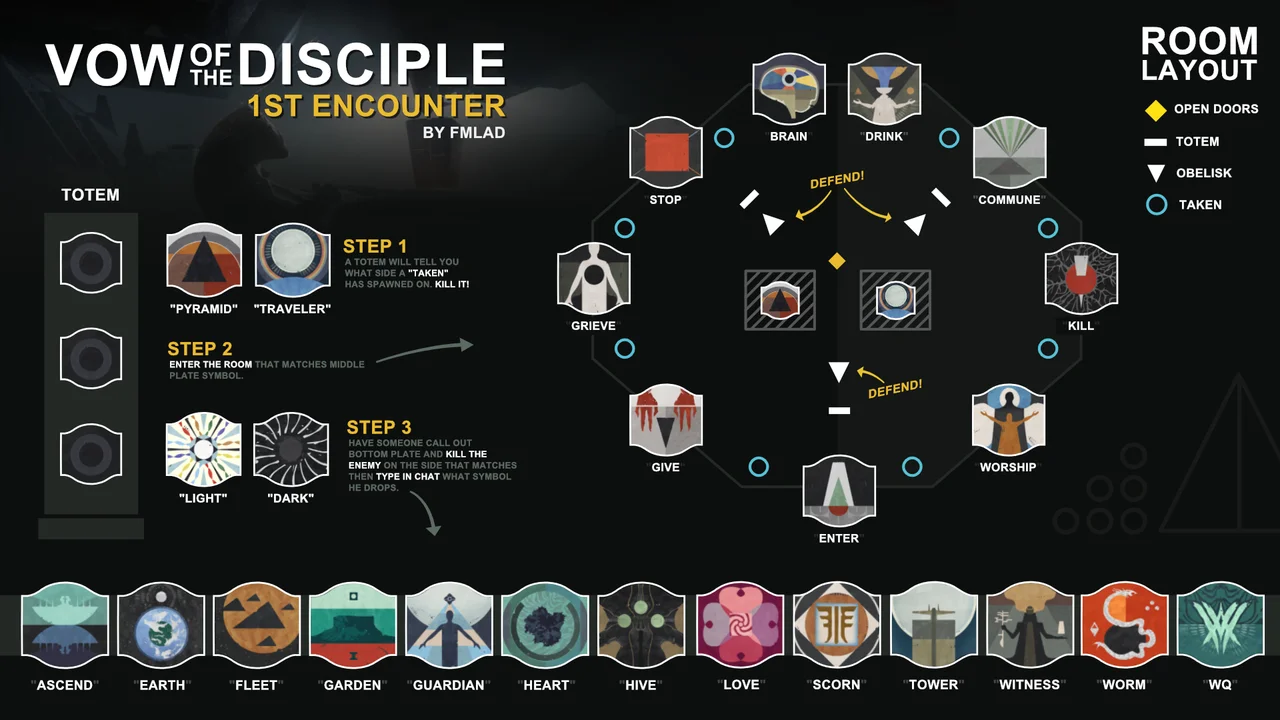
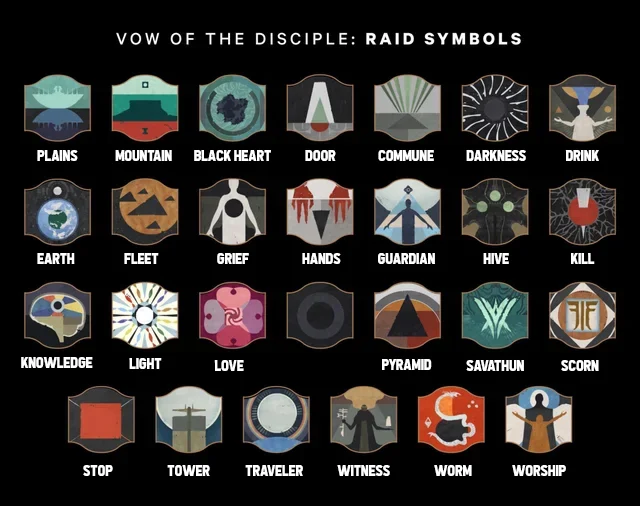
Open the linked symbol chart before entering. Read names aloud and settle aliases such as Remember / Brain and Give / Hands. Call the room, then the requested glyph; keep instructions separate from results.

Shacknews - Vow walkthrough and symbol chart

Assign all six players

Number the roster for relic handoffs. Choose a Normal clear or a particular triumph, check the live Champion modifiers, and give each specialist a backup. The encounter tables below are planning references, not live progress.

OPENING / DISCIPLE'S BOG

Escort the payload.

Defeat Savathun's projection. At each stop, kill the Knowledge Bearer, gather the nine Knowledge pickups, and return them to the barge. Each player carries up to three. Stay near the barge to clear Pervading Darkness; ten stacks kill.

Vaexil - Vow challenges and cross-checks

Disciple's Bog: opening — Destiny 2
Disciple's Bog: openingBungie · Destinypedia

01 / ENCOUNTERS

The encounter route

01 / ENCOUNTER

Acquisition

Protect the obelisks and submit three correct offerings.

Encounter list ↑
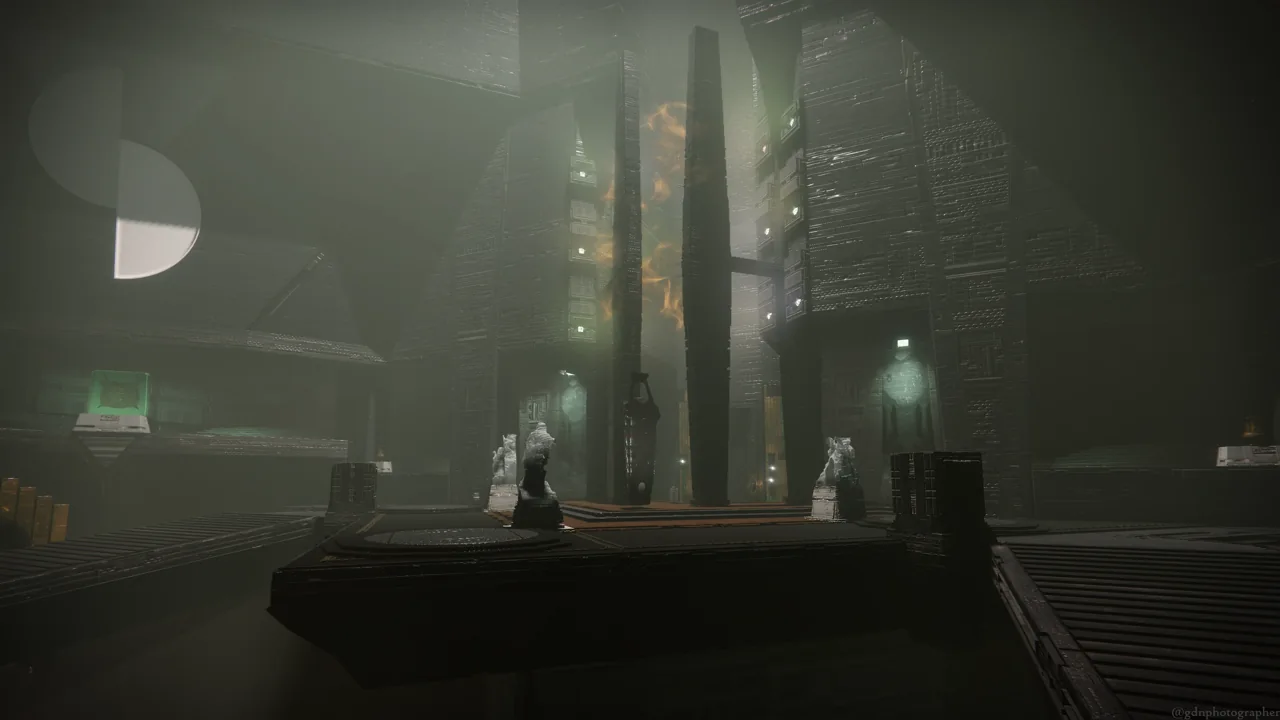
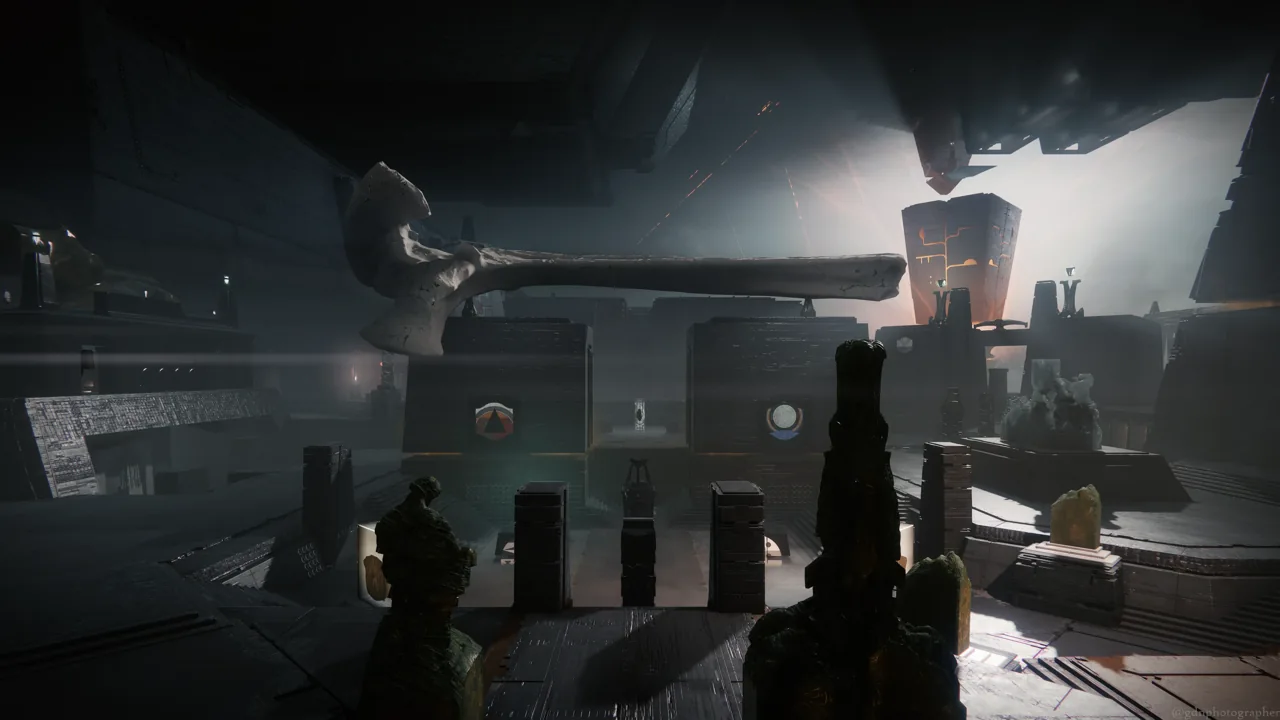
Acquisition — Destiny 2
AcquisitionBungie · Destinypedia

Encounter sequence

  1. Defend and read

    Shoot the central crux to start. Defenders prioritize Abated Adherents attacking obelisks. Read the activated reference pillar from top to bottom.

  2. Find the room

    The top glyph names the Traveler or Pyramid half containing a Disciple's Compass Knight. Kill it. The middle glyph then identifies the runner's room; toggle the central crux if its door is closed.

  3. Report the result

    The bottom glyph calls Light or Darkness. Kill that room's matching Glyphkeeper and report its dropped glyph. Repeat the process to collect three results.

  4. Offer together

    Find the one obelisk containing all three result glyphs across its faces. Assign shooters and hit those three quickly together. Complete three accepted offerings to finish.

Reference pillar order
PositionInstruction
TopTraveler / Pyramid: find the Knight on that half.
MiddleRoom glyph: identify the door.
BottomLight / Darkness: choose the Glyphkeeper.
If the attempt breaks down
  • Obelisk filling: clear attackers immediately; avoid random shots at its glyphs.
  • No matching obelisk: check every face and repeat the three result calls before shooting.

RaidSecrets - Acquisition research

02 / ENCOUNTER

The Caretaker

Offer nine symbols per floor while the stun pair buys time.

Encounter list ↑
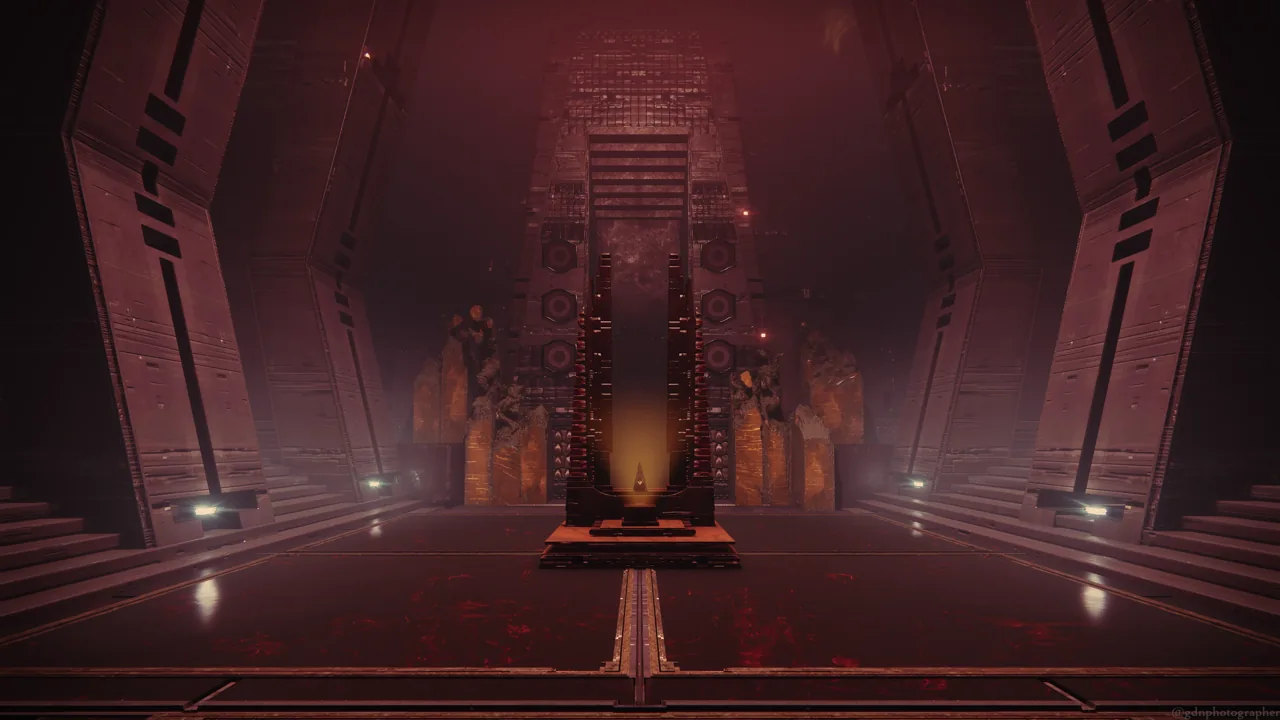
Collection: Caretaker arena — Destiny 2
Collection: Caretaker arenaBungie · Destinypedia

Encounter sequence

  1. Collect and offer

    One runner enters the dark room and remembers up to three symbols. Their partner operates the door crux. Exit before Pervading Darkness reaches ten; shoot your collected glyphs when the obelisk awaits your offering.

  2. Keep the boss stunned

    The front player baits the slam and shoots the glowing face. The back player shoots the exposed back weak point. Repeat while defenders clear enemies and homing projectiles.

  3. Finish nine, then damage

    Alternate runners until all nine symbols are accepted. Gather before stepping onto the first active plate. Damage from each of the three plates as they activate.

  4. Climb and finish

    Repeat on three floors. In the final corridor, use its three damage plates in sequence and kill the Caretaker before the last window ends.

If the attempt breaks down
  • Runner nearly at ten stacks: leave with fewer symbols; a smaller offering is better than a death.
  • Offering rejected: confirm the announced runner and only that trip's collected glyphs.

Shacknews - Vow walkthrough and symbol chart

03 / ENCOUNTER

Exhibition / The Upended

Carry the relics through four rooms before Terminal Resonance expires.

Encounter list ↑
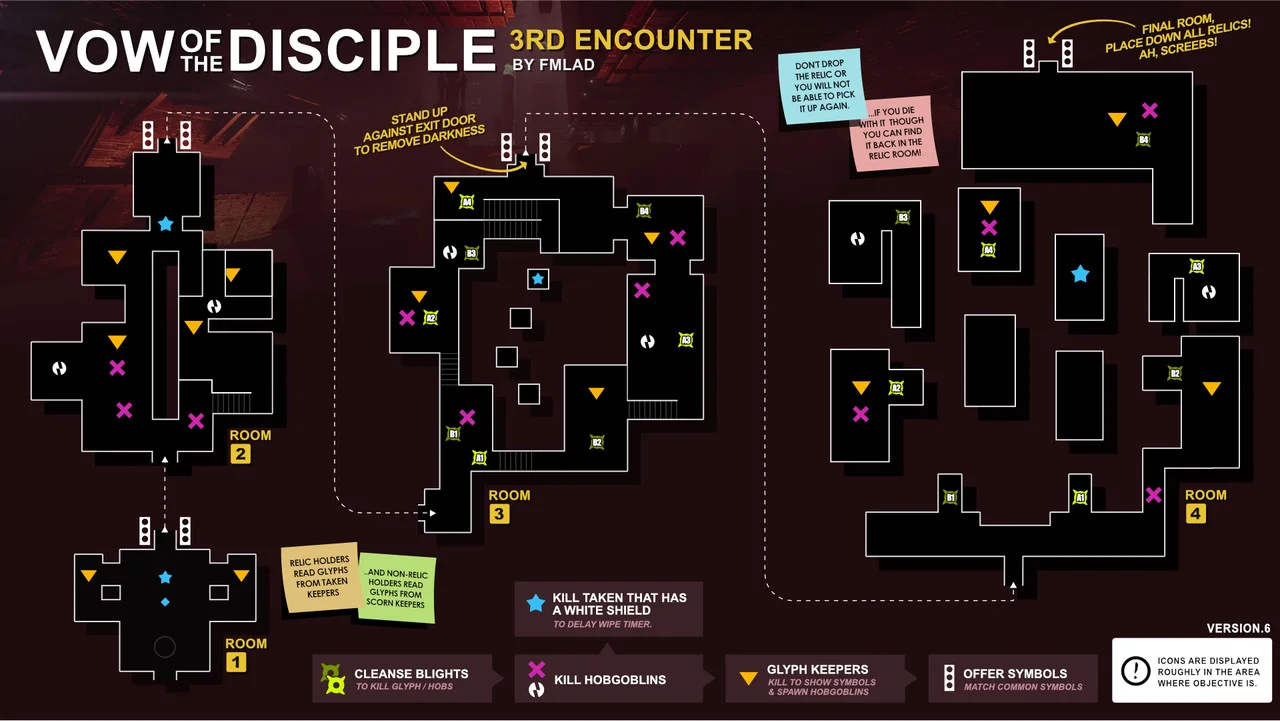
Exhibition — Destiny 2
ExhibitionBungie · Destinypedia

Encounter sequence

  1. Start with the laser

    Take the Darkness relic. Kill Glyphkeepers, compare their three-symbol sets, and shoot the shared glyph at the exit. Use the relic beam on shielded Taken Knights to extend the timer.

  2. Add the shield

    Room two adds the Aegis. Guard near teammates to cleanse Pervading Darkness. Later rooms contain two Glyphkeeper pairs: remember both shared glyphs for the exit.

  3. Clear the blights

    Room three adds Taken Essence. Use its grenade action at blights to remove enemy immunity. Keep moving between lanes and return to the shield for cleansing.

  4. Bank and rotate

    Clear the exit, deposit every relic, then assign eligible new carriers. Curbed Resonance prevents immediate reuse. Complete the fourth room and bank the relics to finish.

Relic handoff plan - suggested assignments
RoomLaserAegisTaken Essence
1Player 1Not presentNot present
2Player 2Player 3Not present
3Player 1Player 4Player 5
4Player 2Player 3Player 6

Confirm Curbed Resonance has expired before pickup. This is a Normal-clear rotation, not a Defenses Down challenge plan.

If the attempt breaks down
  • Clock low: prioritize the next shielded Knight and required glyph enemies.
  • Readers disagree: repeat both sets; the answer is their shared glyph.

Lords of Gaming - Exhibition relics

04 / ENCOUNTER

Rhulk, Disciple of the Witness

Push back the barrier, expose four weak points, then keep moving.

Encounter list ↑
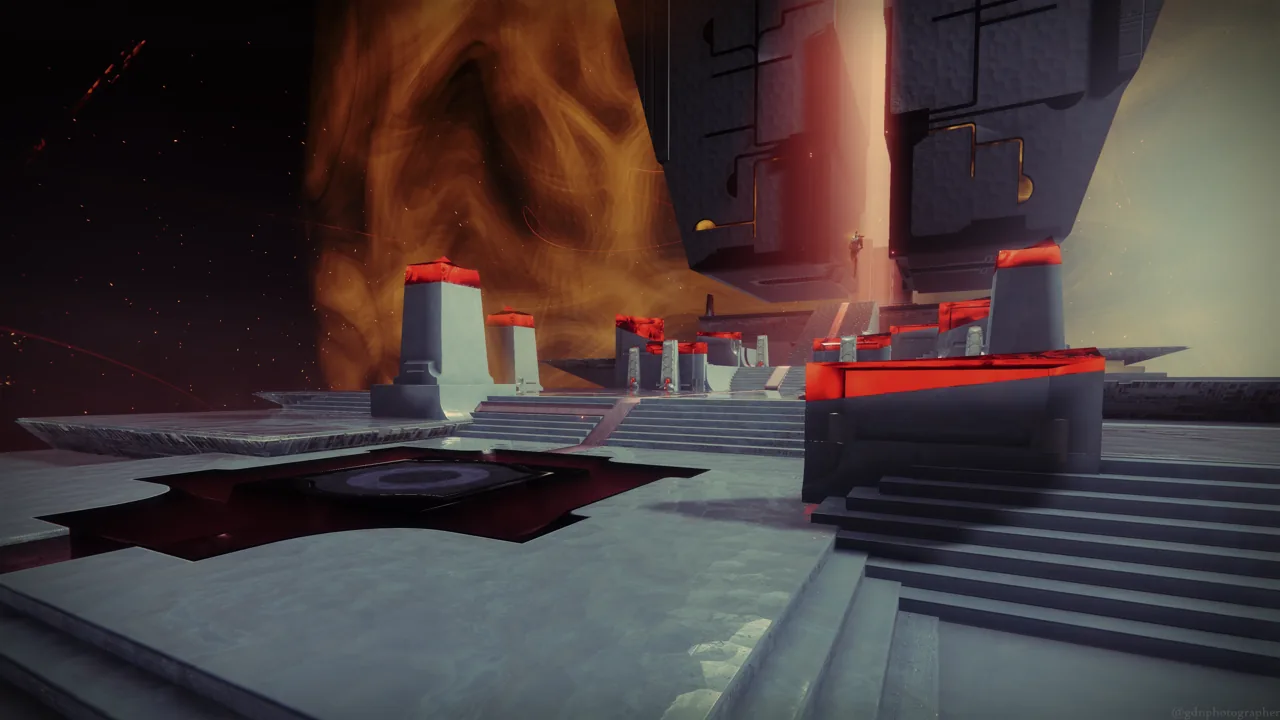
Dominion: Rhulk arena — Destiny 2
Dominion: Rhulk arenaBungie · Destinypedia

Encounter sequence

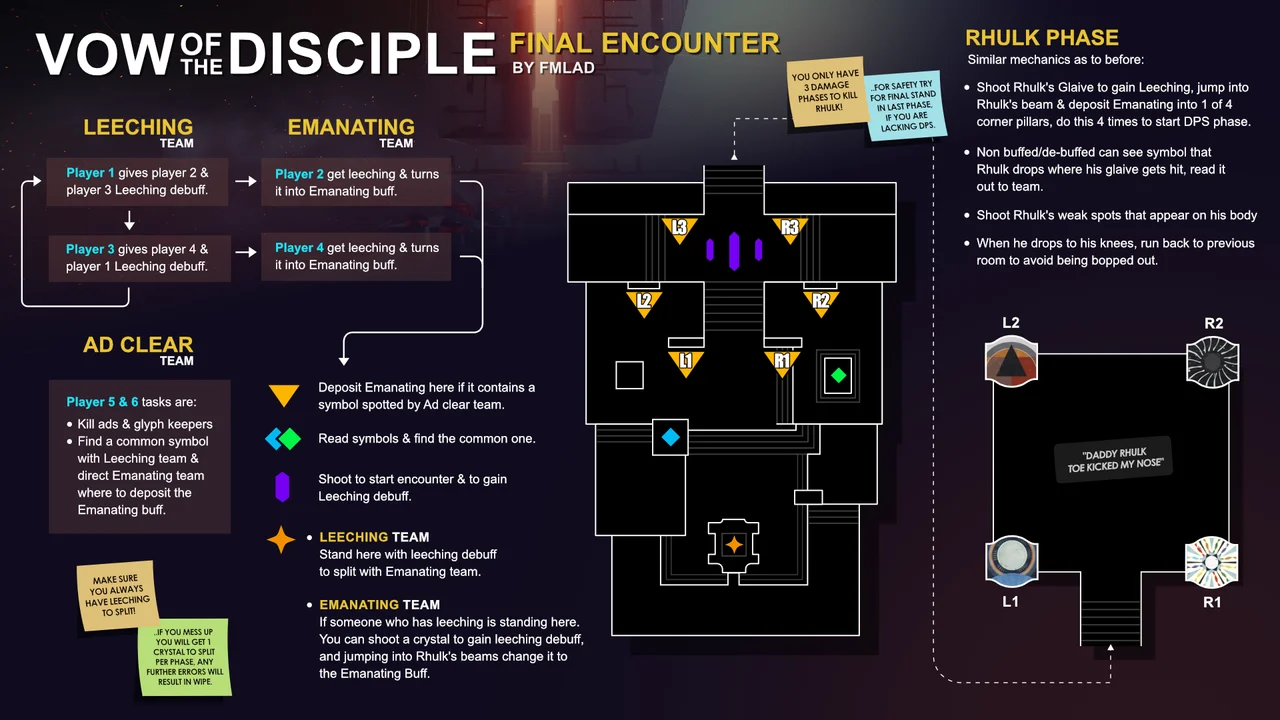
  1. Split Leeching Force

    Break the starting crystal. Its Leeching holder stands on the central plate; two teammates shoot the spawned crystals, receiving the buff while the original holder loses it. Preserve one holder to keep splitting.

  2. Convert and deposit

    Kill Glyphkeepers. Buffed and unbuffed readers compare their sets for the shared glyph. The pillar reader calls a matching deposit. A designated holder enters Rhulk's beam for Emanating Force, then dunks. Repeat for six deposits.

  3. Expose four weak points

    Upstairs, break the dropped glaive for Leeching. An unbuffed teammate reads its glyph. Convert in the beam, deposit at the matching corner, and shoot the exposed shoulder or hip. Repeat four times.

  4. Damage and retreat

    Damage while dodging kicks, dashes and beams. Retreat downstairs when immunity returns. Repeat; at final stand, kill him before Pervading Darkness reaches ten.

Lower-arena buff sequence
StateNext action
Leeching ForceSplit on the central plate, or convert in the beam.
Emanating ForceDeposit at the currently called pillar. Cannot split.
A retained Leeching holderKeeps the next split available while the dunker travels.
If the attempt breaks down
  • Pillar calls are stale: reread after each deposit.
  • Glaive shooter cannot read: an unbuffed teammate must call the glyph.

Destinypedia - Rhulk encounter

02 / RAID RECORDS

Plan a Disciple-Slayer run.

Clear

Vow of the Disciple

Finish all four encounters.

  • Acquisition
  • Caretaker
  • Exhibition
  • Rhulk

RewardLight of the Dark Sun emblem

Master

Master Difficulty Vow of the Disciple

Complete the raid on Master.

  • Master clear

RewardGouging Light sparrow

Team

Clan Fieldtrip

Complete the raid with six clanmates.

  • All encounters

Team

Together in the Deep

Use the same Guardian class throughout.

  • All encounters

Subclass

Dark Charge

All six players use Arc.

  • All encounters

Subclass

Dark Flame

All six players use Solar.

  • All encounters

Subclass

Dark Abyss

All six players use Void.

  • All encounters

Exploration

Secrets of the Sunken Pyramid

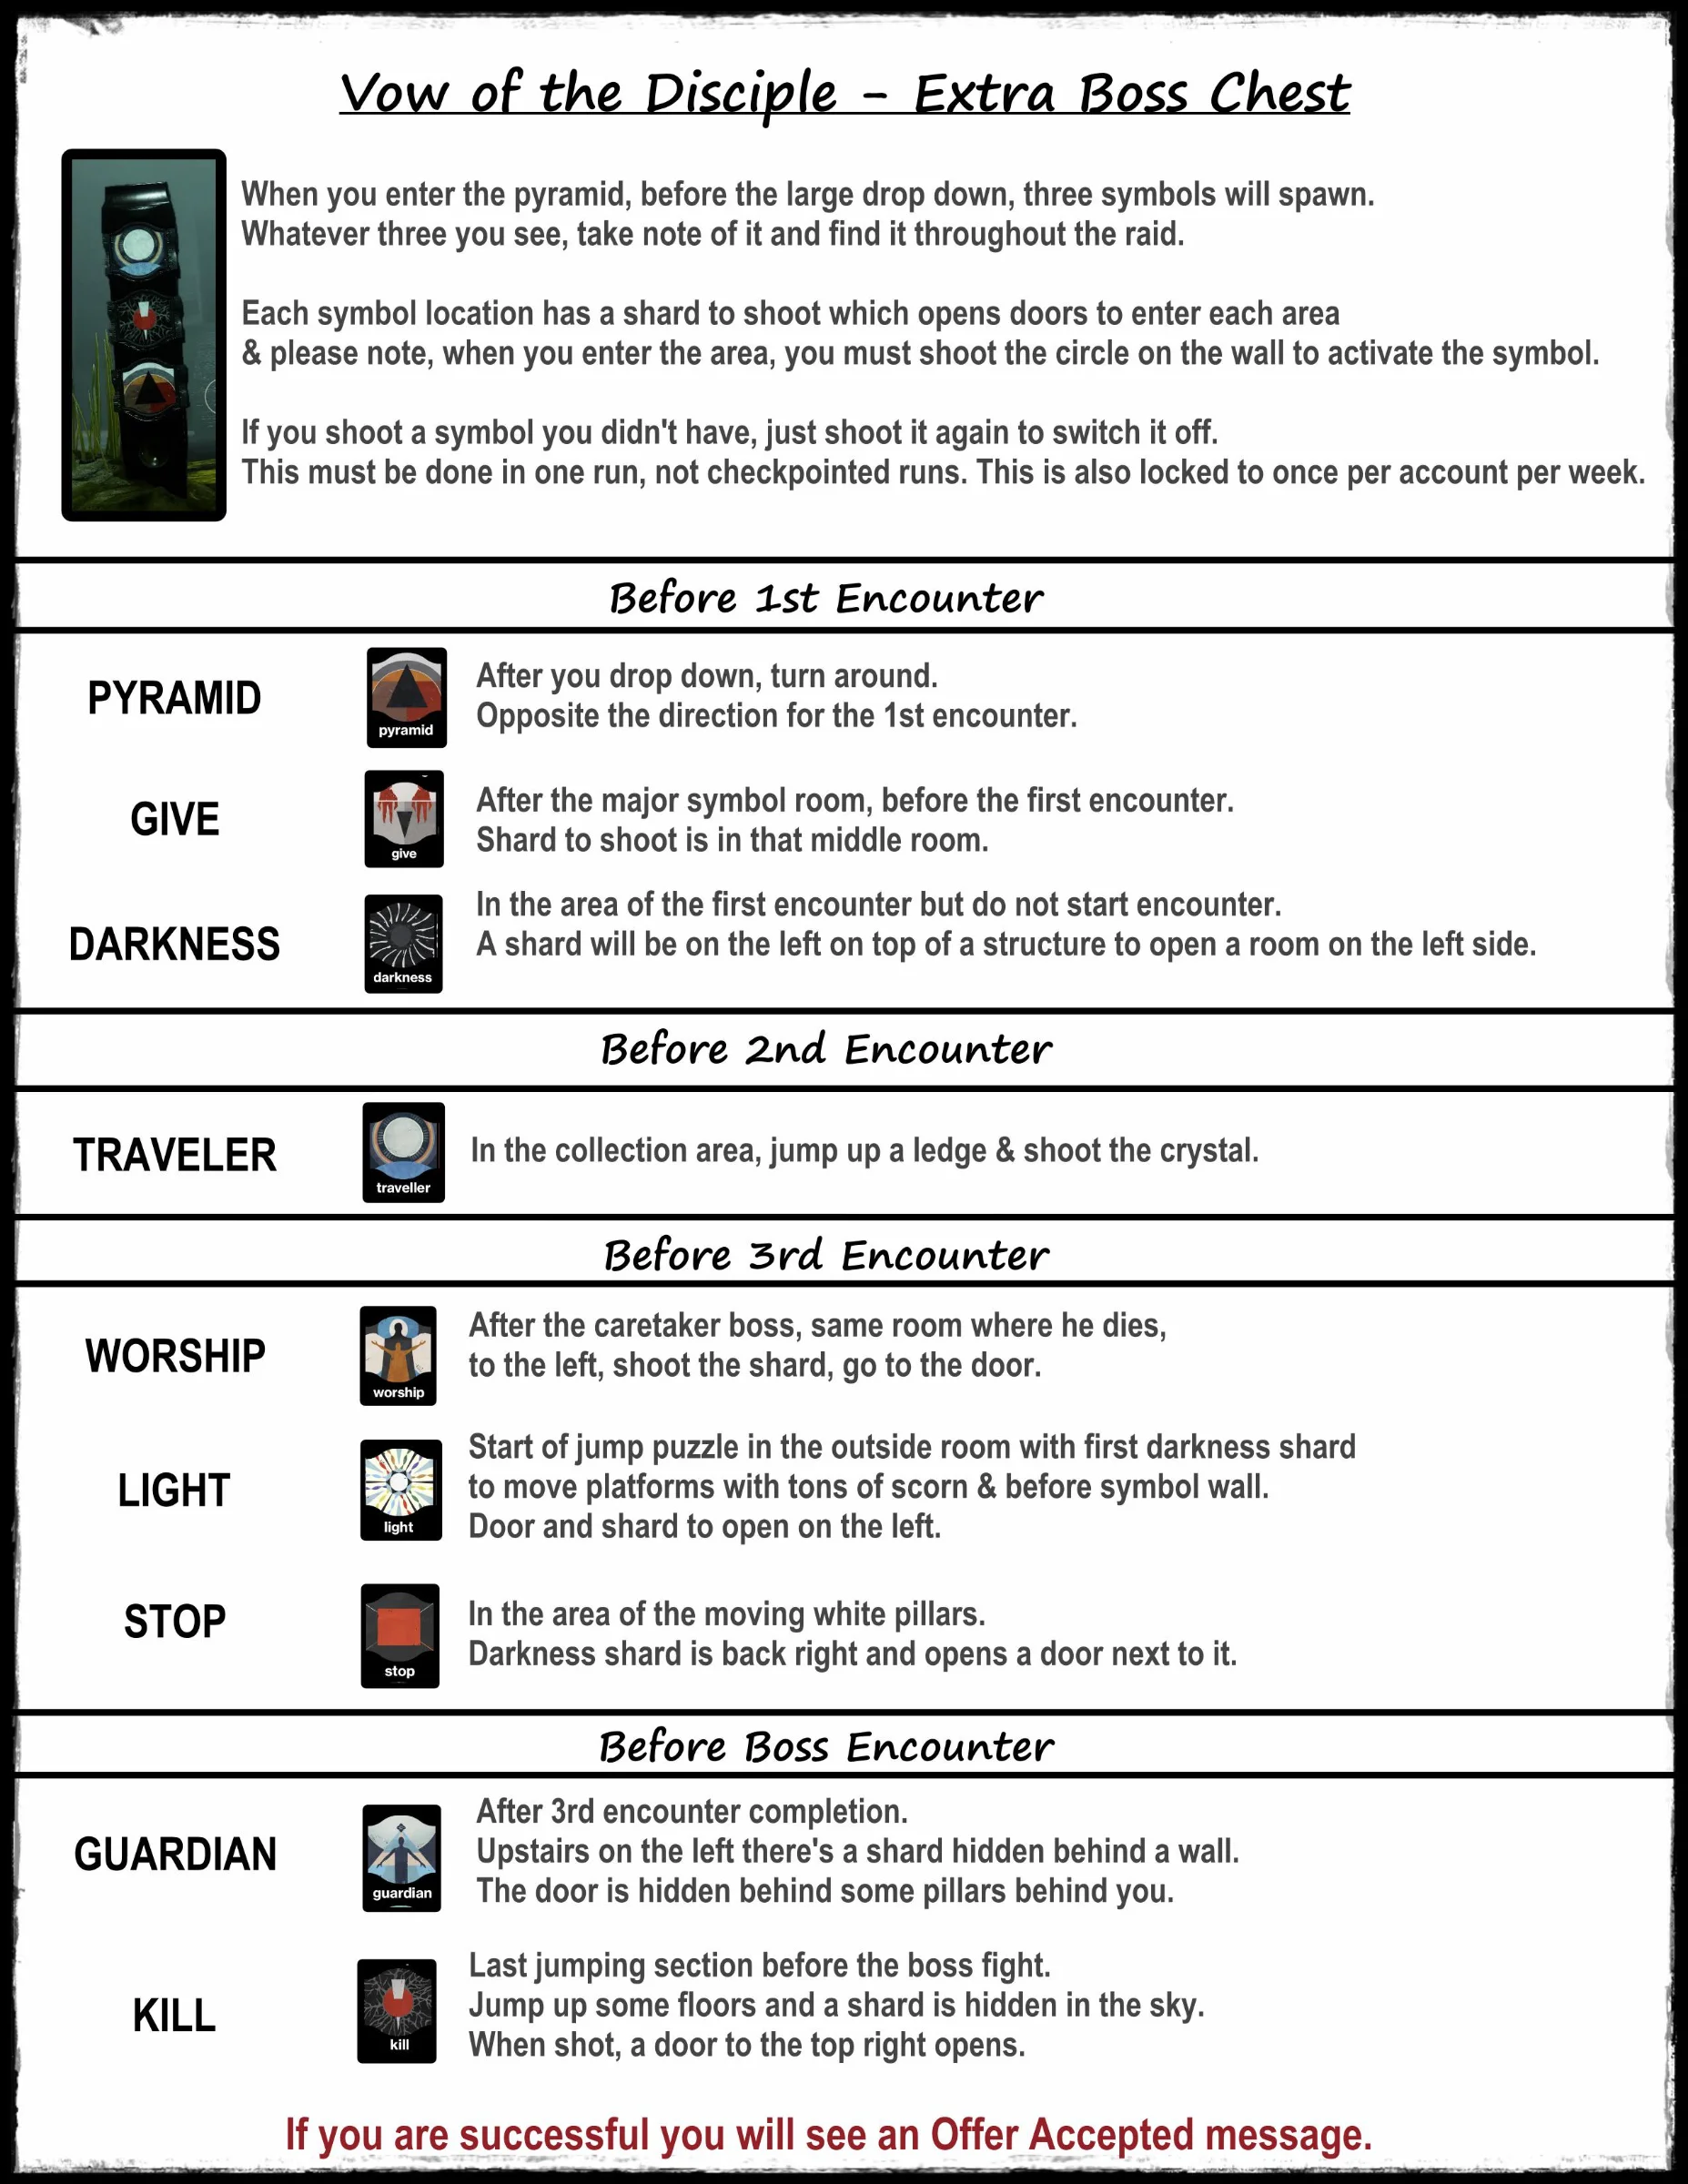
Loot both hidden chests.

  • Hidden chest 1
  • Hidden chest 2

RewardEchoed Anger shader

Acquisition challenge

Swift Destruction

Defeat each group of Unstoppable Abominations within five seconds.

  • Complete challenge

Acquisition triumph

On My Go

Kill Abated Adherents only after they begin attacking an obelisk.

  • Complete encounter

Caretaker challenge

Base Information

Collect only one symbol per room entry.

  • Complete challenge

Caretaker triumph

Handle With Care

Every player must stun the Caretaker at least once on each floor.

  • Complete encounter

Exhibition challenge

Defenses Down

Each player kills at most one shielded Taken Knight during the encounter.

  • Complete challenge

Exhibition triumph

Glyph to Glyph

Kill both Glyphkeepers in each pair within five seconds.

  • Complete encounter

Rhulk challenge

Looping Catalyst

Retain Leeching Force throughout the lower barrier phase.

  • Complete challenge

Rhulk triumph

Symmetrical Energy

Pair every lower-arena energy deposit with another within five seconds.

  • Complete encounter

Master challenges

Pyramid Conqueror

Complete all four encounter challenges on Master.

  • Acquisition
  • Caretaker
  • Exhibition
  • Rhulk

Optional / not required for title

Dark Chill

All six players use Stasis.

  • All encounters

Optional / not required for title

Dark Entanglement

All six players use Strand.

  • All encounters

Optional / flawless

Risen from the Deep

Complete the raid with no fireteam deaths.

  • Full raid

RewardDivinity's Caress shader

Challenge objectives require a different plan from the Normal walkthrough above. Check the live activity card for the active challenge and Master modifiers.

light.gg - Disciple-Slayer records · light.gg - optional Vow records · Shacknews - title objectives · Vaexil - Vow challenges and cross-checks

03 / REWARDS

Encounter loot

Base encounter drops - random rewards, not guaranteed
EncounterWeaponsArmor slots
AcquisitionSubmission; Deliverance; CataclysmicHelmet, chest, legs
CaretakerSubmission; Insidious; Forbearance; CataclysmicHelmet, arms, class item
ExhibitionSubmission; DeliveranceChest, legs
RhulkInsidious; Forbearance; Lubrae's Ruin; Collective Obligation Exotic pulse rifleHelmet, arms, class item

Use the live activity reward preview for featured status, farming eligibility and Master rewards. This table does not promise a drop or a fixed weekly farming schedule.

Shacknews - Vow loot table

04 / REFERENCES

Sources & scope

Source-reviewed Normal walkthrough, ready for ARG playtesting. Roles and callouts are teaching recommendations. Master tactics, detailed challenge strategies, hidden-chest routes and bonus-chest puzzles are separate topics.

Existing encounter images retain their source credits. No authenticated player data is displayed.

D2RAIDGUIDE / FIRETEAM

Plan the next clear.

Compare your team’s seal and triumph progress.

Open fireteam ↗