← All dungeons

Sundered Doctrine

Released
Location
Throne World
Power
300 / 300Combatant / Activity
Route
3 encounters

Full route / first editionSource-reviewed · Not yet verified in game · Updated · What changed

Change history (3)
  1. Cosmetic

    Encounter list: The encounter list now also links the approach and traversal sections.

  2. New

    Riddle, Zoetic Lockset and Kerrev: Community maps and diagrams added, each credited to its maker. Thanks: Net (suggested)

  3. New

    Whole guide: Published with the full route, roles, recovery and solo notes.

Main changes since the September 2026 rewrite, newest first. Corrections fix something that was wrong; site-wide layout changes aren’t listed. Source review means checked against the cited sources, not played.

Prepare for the whole route.

Prepare for precise interactions

Bring dependable Subjugator control, healing and ranged boss damage. Keep explosive fire away from puzzle switches when teammates are adjusting them.

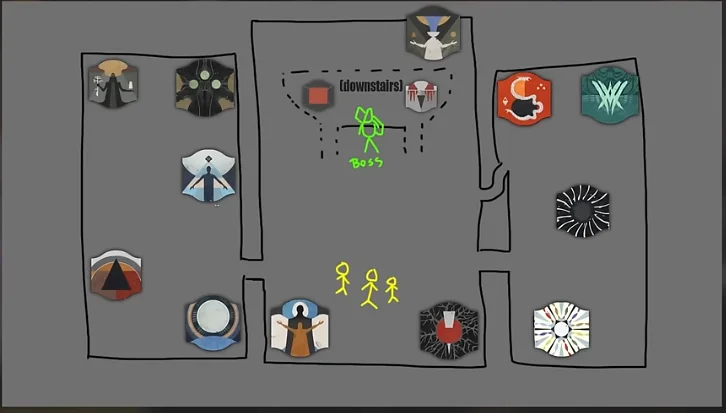
Agree on glyph names

Visit the symbol gallery behind the first rally area. Approach and aim at symbols to read their official HUD names. Use these names throughout the run.

Lenses, Knowledge and the lock

Lenses, Knowledge and the lock
MechanicExecution
TruthspeakerDefeat this named Grim to reveal a true glyph. Use evidence instead of guessing a sentence from lore.
Lens BearerDefeat the Subjugator and place its dropped lens in an empty stand. Align an unpowered route before firing the source.
KnowledgeOne, two or three splinters give Heightened, Brimming or Overflowing Knowledge. Depositing moves a wheel by that many positions.
Wheel directionRead the rotating indicator. Shoot its crux to reverse direction before depositing.
Zoetic targetLock Stop, Stop, Stop, then Kill. Viewed from entry, the completed display reads Kill / Stop / Stop / Stop.

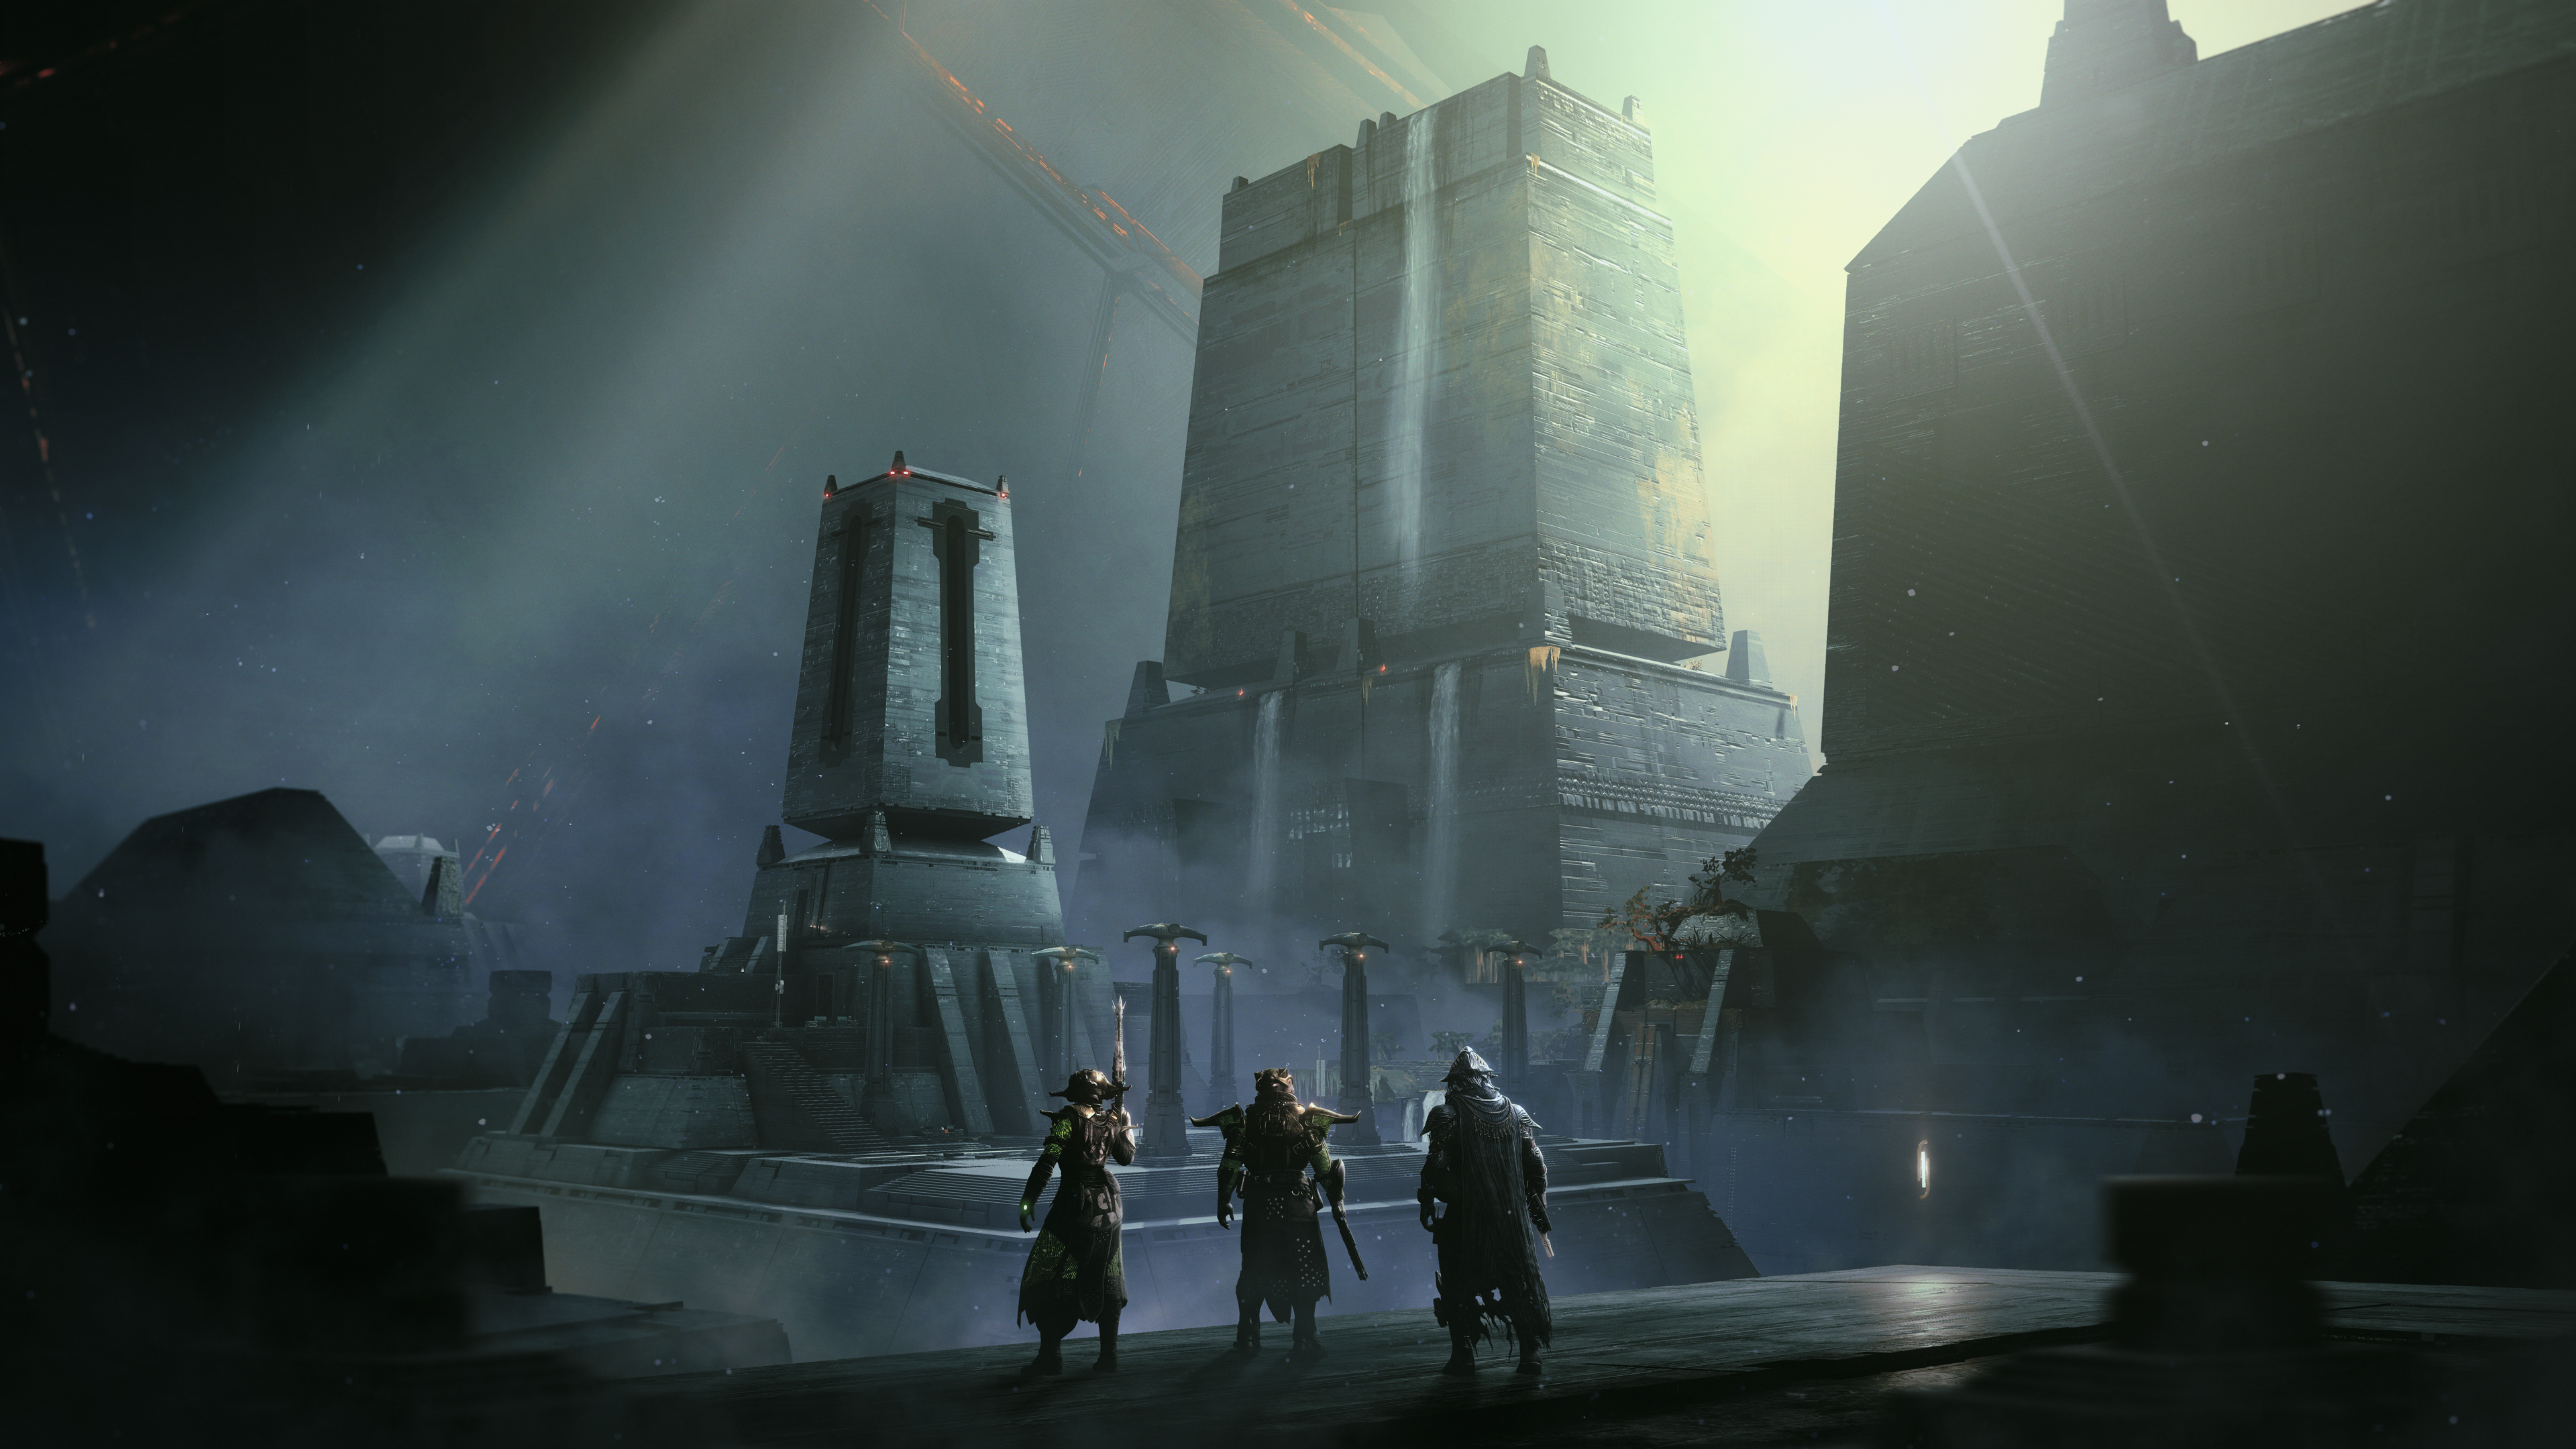
APPROACH / THE SUNKEN PYRAMID

Find the passage behind the waterfall.

Pass the Hidden’s camp and take the route right across the bridge. Bypass the closed door using the opening above-left. Clear the Dread rooms, stand on the lowering block to descend, then find the small waterfall beneath two red lights. The concealed opening leads to the first rally.

Route reference ↗

Encounter list ↑

The encounter route

01 / ENCOUNTER

Solve the Riddle

Complete rounds requiring one, two and three correct beam routes.

Encounter list ↑
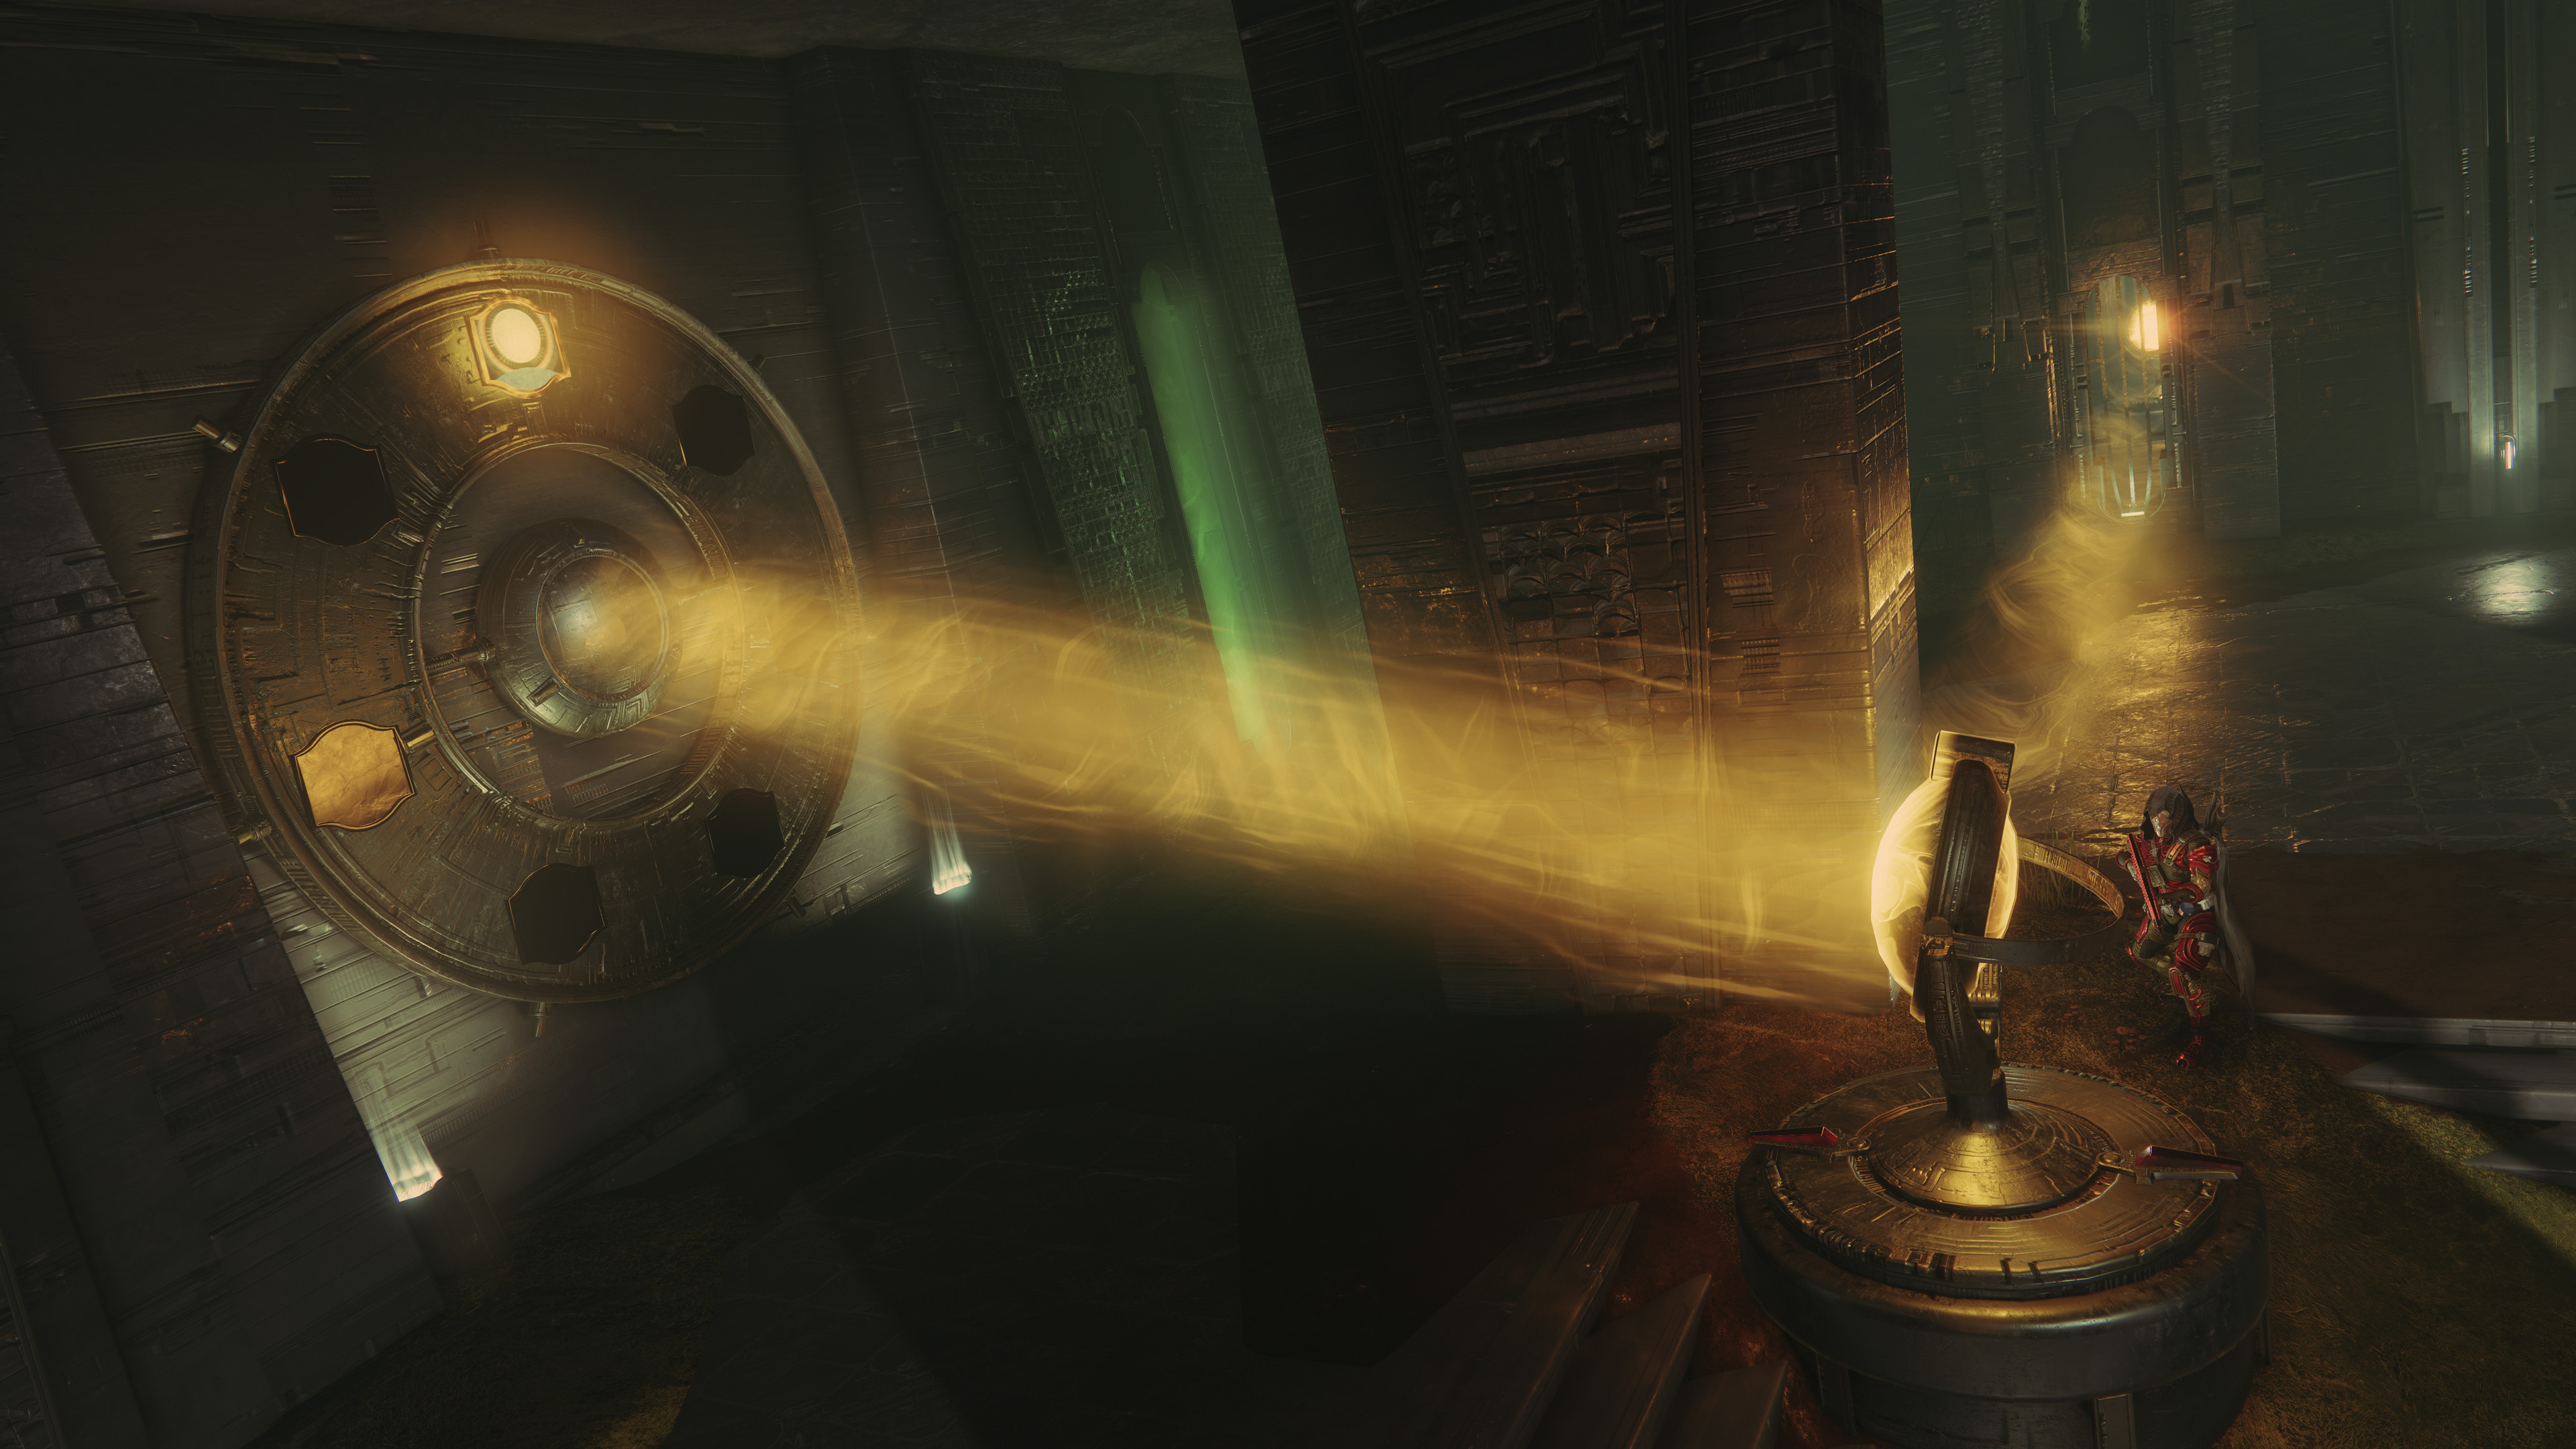
Solve the Riddle, Sundered Doctrine
Solve the RiddleBungie · Sundered Doctrine press kit

Maps & diagrams

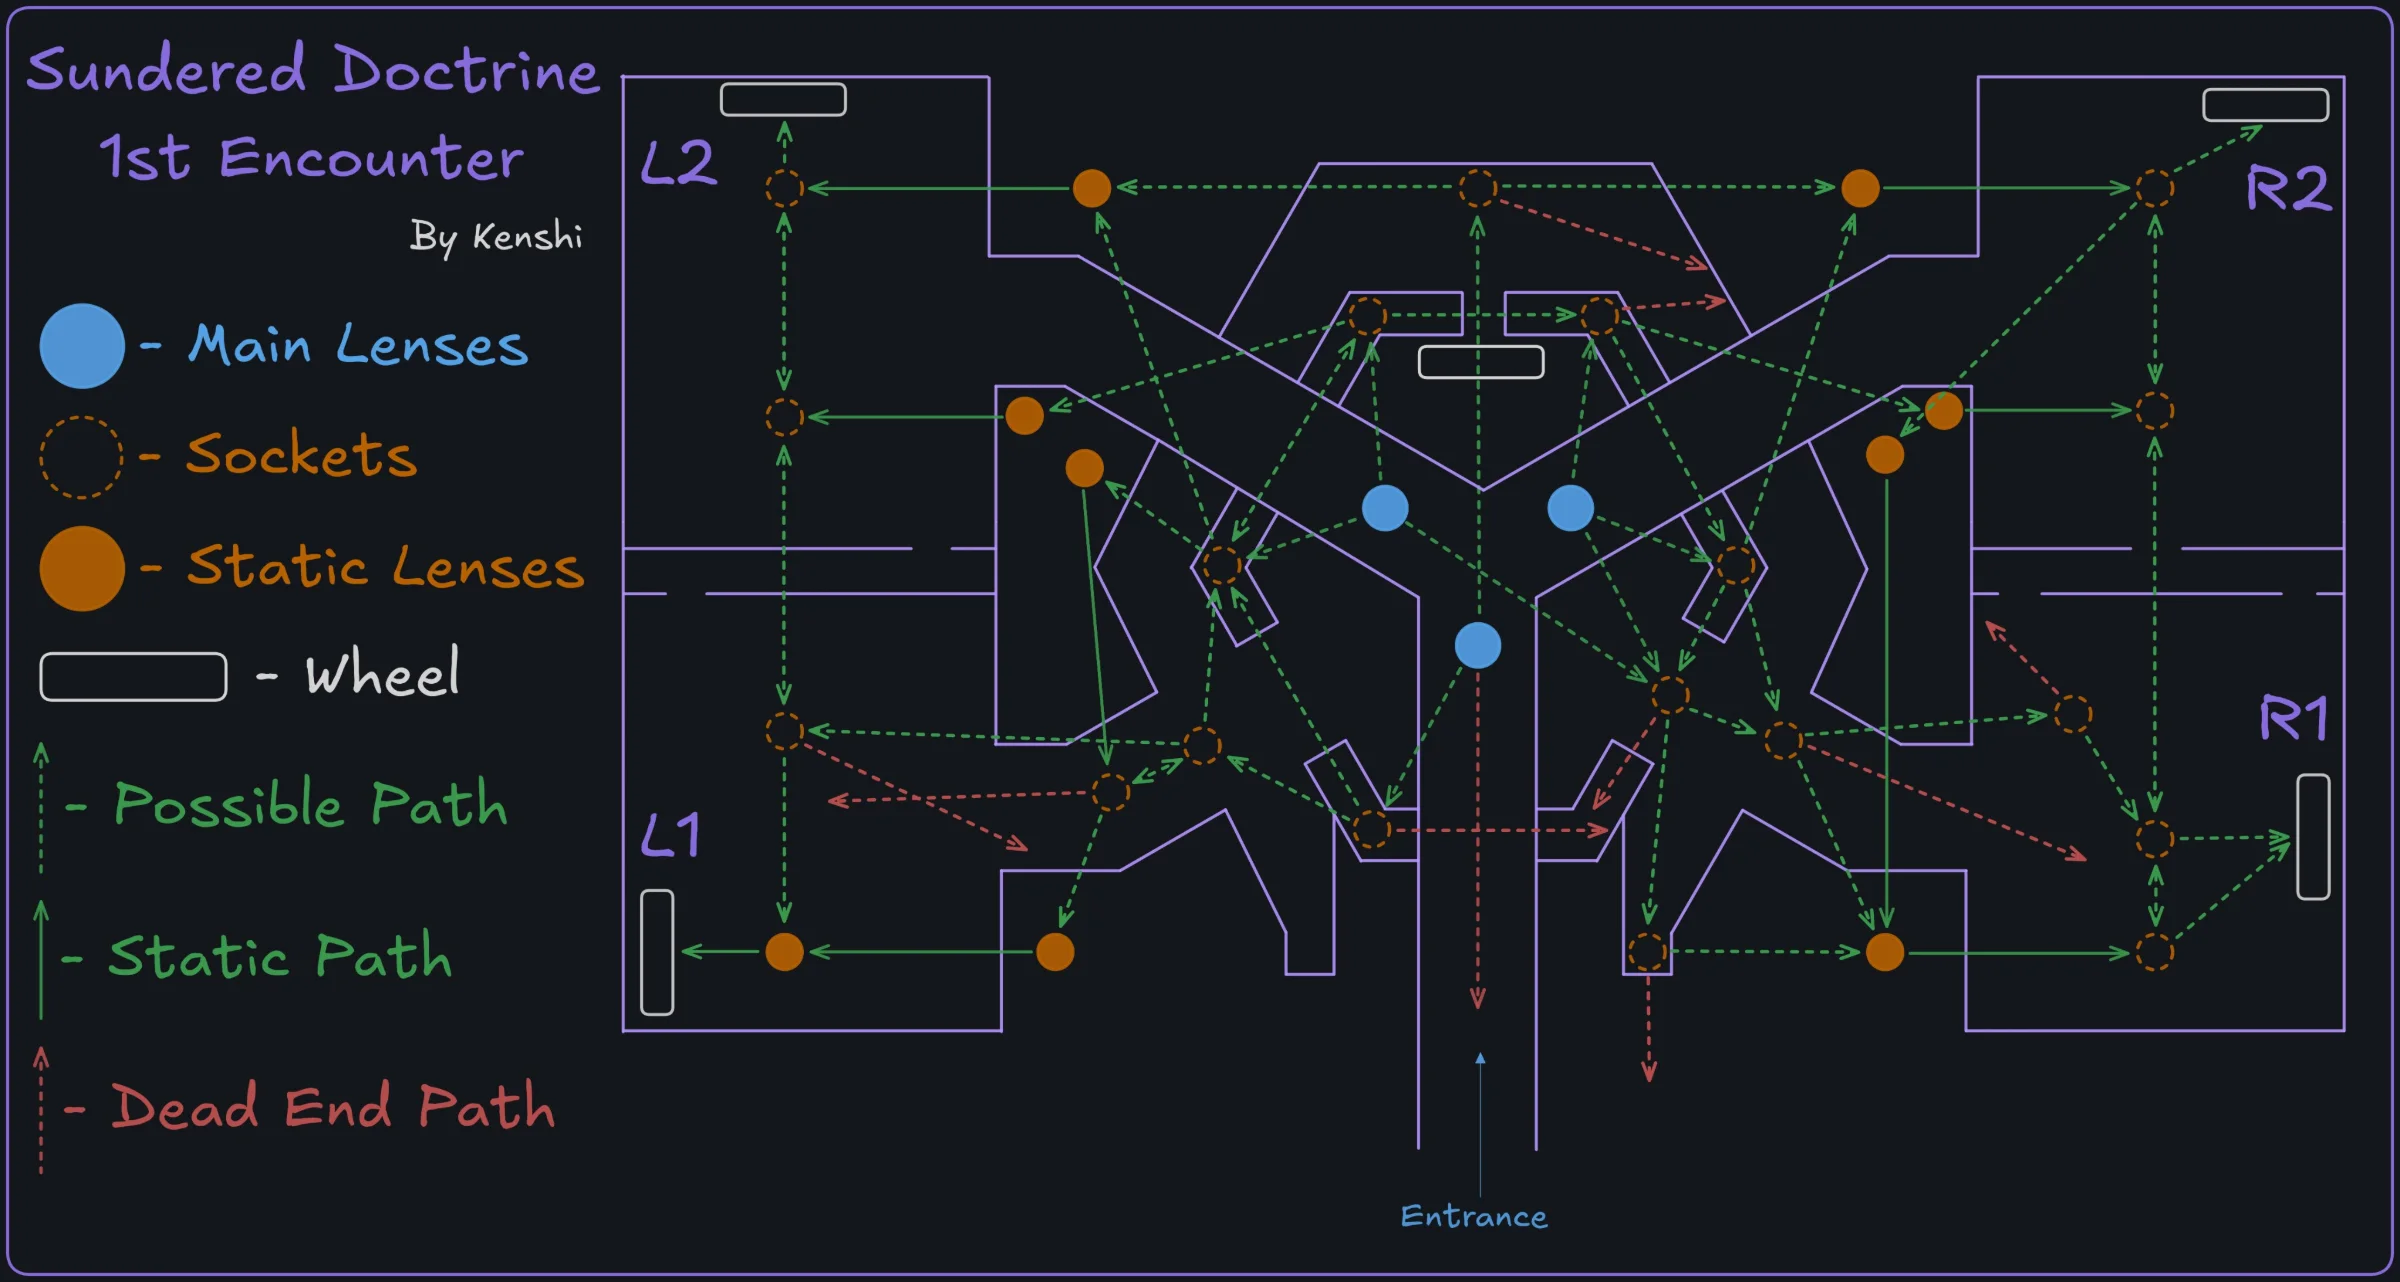
Solve the Riddle: lenses, sockets and every possible beam path
Solve the Riddle: lenses, sockets and every possible beam pathMap: Kenshi
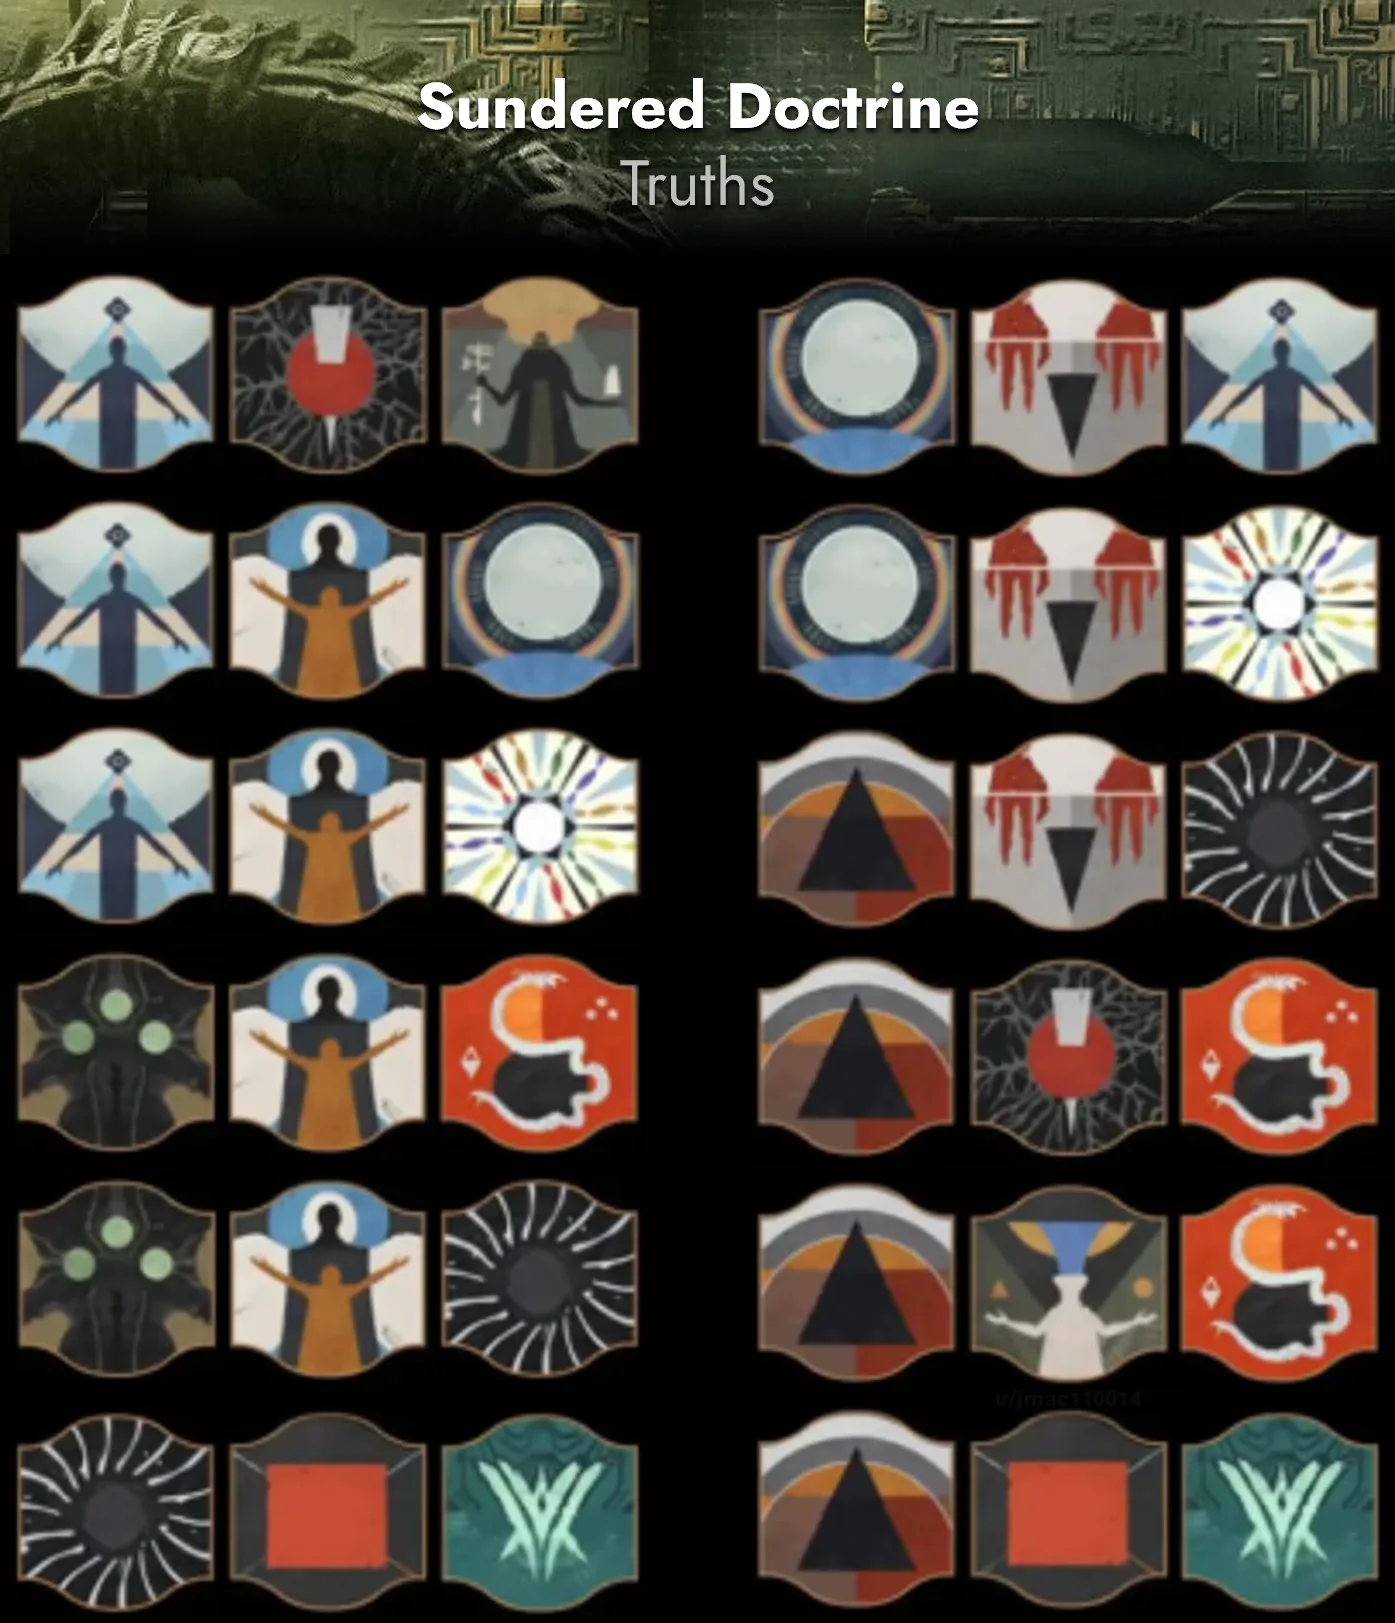
The Truths: known three-glyph sentences, for finding the missing glyph here and the lie at Kerrev
The Truths: known three-glyph sentences, for finding the missing glyph here and the lie at KerrevChart: u/jmac110014

Encounter sequence

  1. Find the missing truth

    Rotate the starting lens to begin. Read the central sentence. Find and kill the Truthspeaker, then identify the revealed glyph’s target plate in one of the four side rooms.

  2. Build backward from the target

    Choose an unused central source. Defeat Lens Bearers, collect lenses and fill the stands needed to connect that source to the target. Pre-align before powering it.

  3. Send the beam

    Shoot the source’s crux to power the route. Verify the beam reaches the correct plate and the truth is accepted.

  4. Complete the later rounds

    Repeat for two routes in round two and three in round three. Solve each missing glyph in turn and preserve accepted paths while using the remaining sources.

If the attempt breaks down

A wrong target summons a Tormentor. Clear it and recheck the glyph. Repeatedly rotating an energized lens can break it; switch off the source before rebuilding.
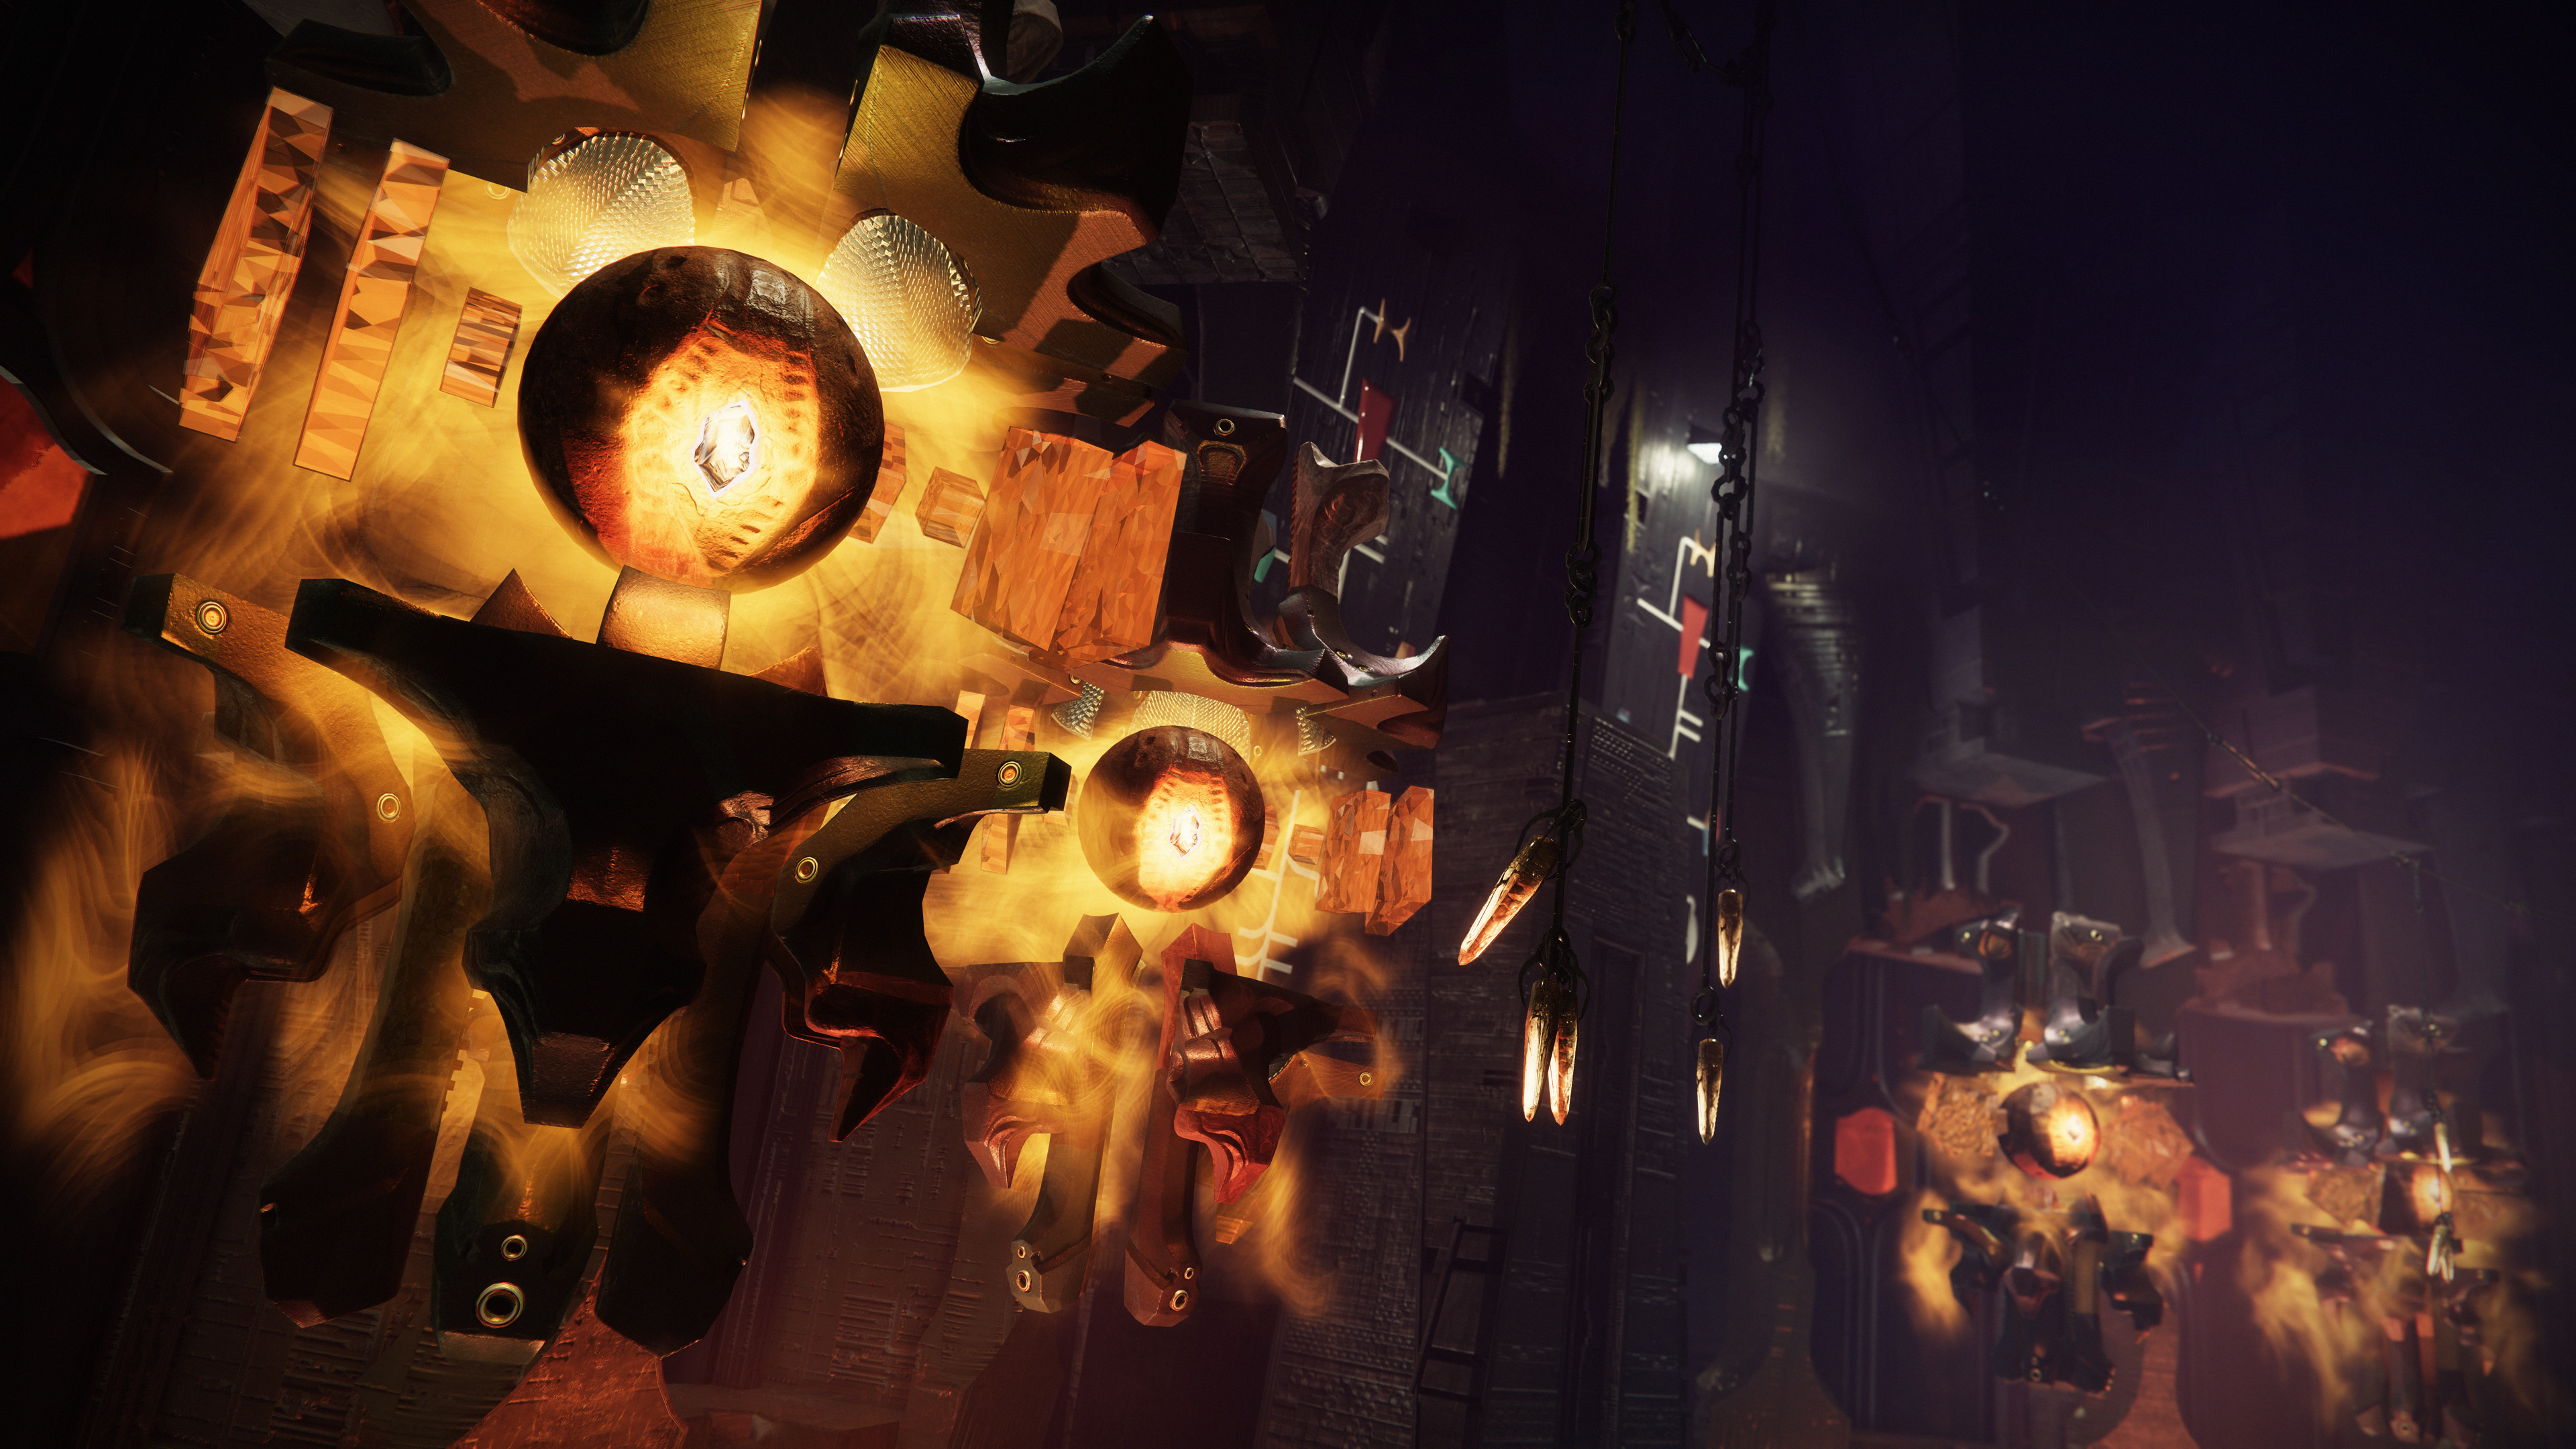
Encounter source & visual reference ↗

TRAVERSAL / THE LABYRINTH

Pass the rolling traps and practice the wheels.

  1. Descend carefully

    Take the passage under the reward chest through the maze. Follow the side route from the large enemy room down the slide, keeping off the pit. Cross the sloped ledges to the rolling-boulder corridor.

  2. Use the alcoves

    Wait for boulders to pass, then move between safe recesses to the middle doorway. Continue past the next crossing trap.

  3. Match the exit glyphs

    In the two-wheel room, defeat Wizards for splinters. Collect the exact count needed, check direction and deposit to select the two symbols displayed by the exit.

Route reference ↗

Encounter list ↑

02 / ENCOUNTER

Zoetic Lockset

Control what the Shriekers read, then damage their shared health pool.

Encounter list ↑
Zoetic Lockset, Sundered Doctrine
Zoetic LocksetBungie · Sundered Doctrine press kit

Maps & diagrams

Zoetic Lockset: which symbol is in which part of the room
Zoetic Lockset: which symbol is in which part of the roomCommunity-made
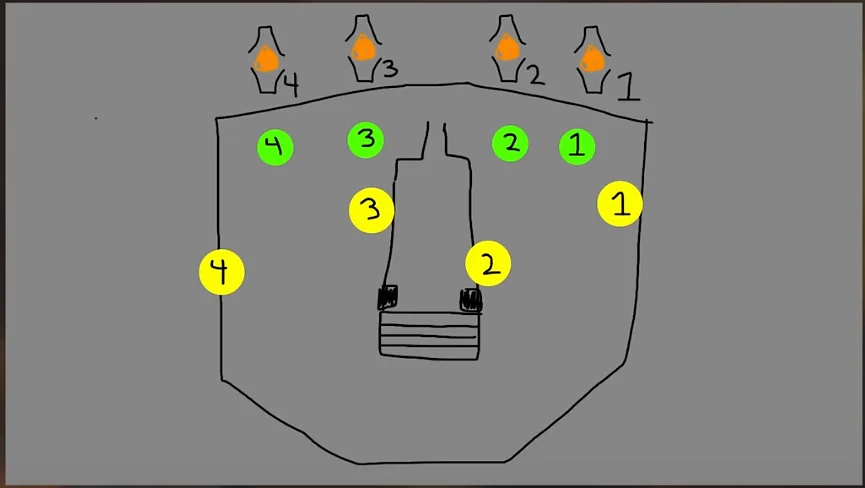
Zoetic Lockset: wheel and lock positions, numbered
Zoetic Lockset: wheel and lock positions, numberedCommunity-made

Encounter sequence

  1. Gather Knowledge

    Start the encounter and defeat Wizards for splinters. Carry only the number needed for your next move. Avoid the Shrieker spotlights and clear tracking seekers.

  2. Control each reading

    A Shrieker reads the highlighted wheel glyph. Hive brings Ogres; Remember, also called Knowledge, brings reinforcements; Commune brings seekers. Stop reduces pressure.

  3. Delay Kill until the final lock

    Follow the highlighted back panel, locking Stop in the rightmost, then middle-right, then middle-left positions. Set the final leftmost position to Kill for the longer damage phase.

  4. Damage open eyes

    When the lock cracks, fire into an open Shrieker. Switch targets when its shell closes; all four share health. Repeat if necessary.

If the attempt breaks down

An early Kill gives a shorter damage window; use it and rebuild. If a deposit overshoots, recalculate from the current symbol and direction.

Encounter source & visual reference ↗

TRAVERSAL / THE VAULT ROUTE

Roll the eye and reconnect two beams.

Push a fallen Shrieker eye across the central bridge into the bowl near the chest to open the exit. Follow the worm remains to the next lens puzzle. Connect separate sources to Worm and Enter. Beyond it, keep shooting the pressure door while the team crosses; climb the next platform, turn back and take the upper opening toward the collection room.

Route reference ↗

Encounter list ↑

03 / ENCOUNTER

Kerrev, the Erased

Illuminate the false sentence, extinguish the true one and survive the burn.

Encounter list ↑
Kerrev, the Erased, Sundered Doctrine
Kerrev, the ErasedBungie · Sundered Doctrine press kit

Encounter sequence

  1. Separate truth from lie

    Start the encounter and split the six-symbol display into two vertical sentences, read top to bottom. Kill the Truthspeaker: its glyph identifies the true side. The other sentence is the lie.

  2. Unlock the controls

    Kill Unwritten Attendants for Unwritten Empowerment, then shoot the Strand locks around blocked controls. Enter left through the shoot-to-open door; use the lowering block on the right.

  3. Light only the lie

    Adjust lenses across all three rooms so the three false-sentence glyphs are lit and the three true-sentence glyphs are dark. Check both conditions before activating the central console.

  4. Hide, then damage

    Break line of sight with the burning central structure using solid pillars. After the burn strips Kerrev’s shield, damage while watching his movement and Strand attacks.

  5. Shelter again

    At the next burn warning, get behind cover again. Re-read the new sentences and repeat the configuration until Kerrev falls.

If the attempt breaks down

Do not trigger the console on an assumed answer. A runner should confirm both their lit and unlit glyphs, then identify cover before the burn.

Encounter source & visual reference ↗

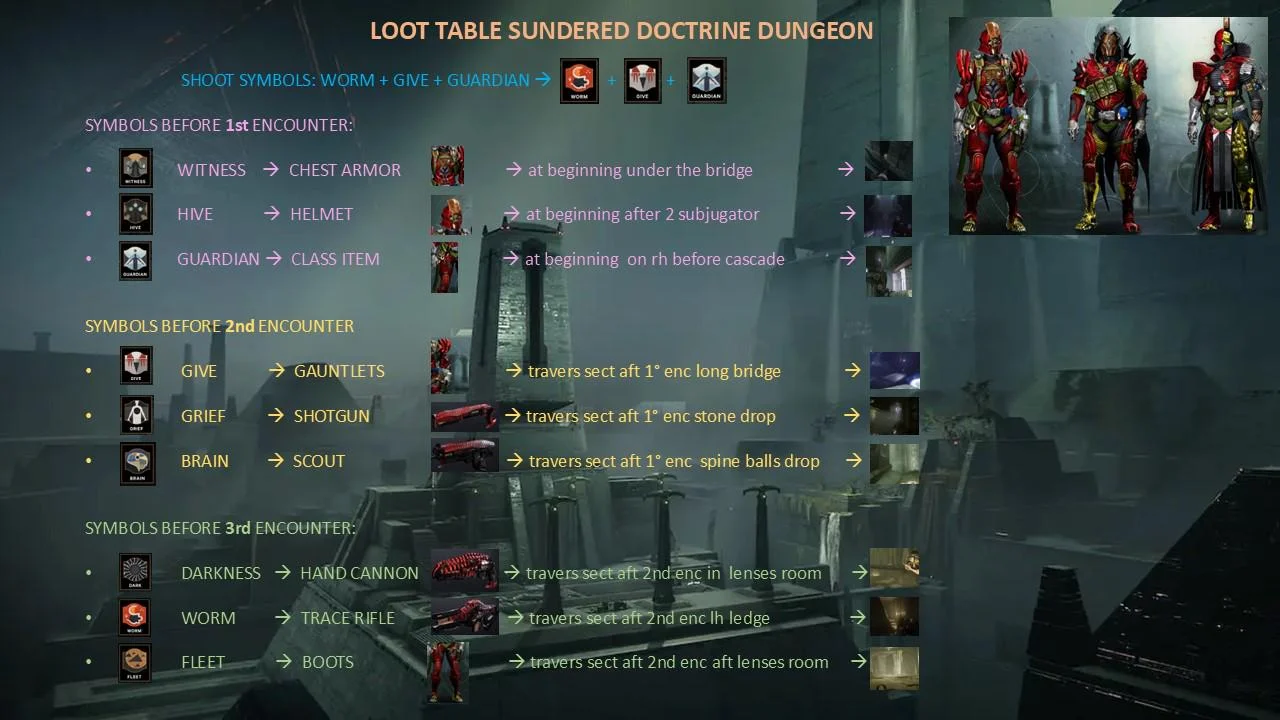
Hidden symbols across the dungeon

Where each hidden symbol is, and the reward it unlocks
Where each hidden symbol is, and the reward it unlocksGuide: u/diabeticgrandpa (via Reddit)

Keep a safe next move.

Solve one task at a time

Stabilize the room, read the glyph and finish its route before starting another. Keep a written callout when several symbols are involved.

Keep an escape route

Prioritize the next wheel reading at Zoetic. At Kerrev, plan pillar cover before interacting with the console.

Choose optional stops before launch.

Finality’s Auger

The Exotic linear fusion rifle can drop from Kerrev. Its catalyst is a separate optional objective.

The Drowning Labyrinth

Quest puzzles, Hive worms and hidden chests add return-run objectives. The first optional chest uses three maze cruxes; another sits above the later worm chamber. Follow the linked route for detours and quest prerequisites.

Keep the reference close.

Released 7 February 2025. This guide covers the standard clear. Source review excludes old Power targets, weapon rankings and reward schedules. Detailed optional routes are linked below.